
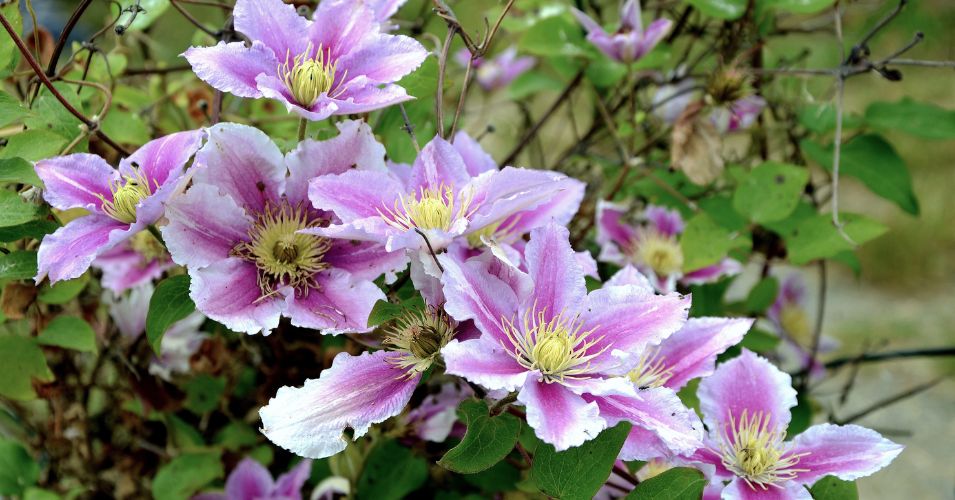
Fall can leave a clematis looking a little worse for wear. The flowers are disappearing, leaves are changing color, and those once-lively vines may suddenly look tired and untidy. Most of this is simply part of the plant’s normal shift toward winter dormancy.
That does not mean you should forget about it completely, though. A few well-timed fall jobs can help your clematis get through colder weather without unnecessary stress.
The trick is not to overdo things. Knowing when to water, clean up, prune, or add protection will help you give your clematis exactly what it needs this fall.
Clean Up Clematis as the Growing Season Ends
By fall, even a clematis that looked spectacular all summer can become a bit of a mess. Brown leaves collect around the base, old flowers cling to the vine, and some stems may look dry or battered after months of growth. Most of this is perfectly normal, but a quick cleanup is worthwhile before cold weather settles in.
Begin with what has fallen to the ground. Rake or pick up dead leaves, old flowers, broken pieces of stem, and other debris sitting beneath the plant.
This matters even more if your clematis had leaf spots, wilt, or other disease problems during the growing season, since leaving affected plant material nearby can let problems linger.
Don’t compost material that looks diseased unless you know your compost pile gets hot enough to kill plant pathogens. Putting it in your household or garden waste is often the safer choice.
Next, look over the vine without feeling that every brown piece needs to disappear. Clematis naturally starts shutting down as days shorten and temperatures fall. Yellowing leaves and tired-looking growth are not automatically signs that something has gone wrong.
You can remove stems that are clearly snapped, damaged, or dead. Leave healthy stems in place for now unless you know your particular clematis should be pruned in fall.
That distinction is important because different types of clematis flower on different growth. An enthusiastic fall haircut can accidentally remove stems that would have produced next year’s blooms.
While you are working around the base, pull any weeds that have moved in during late summer. Small weeds are much easier to deal with now than after they establish stronger roots.
Be gentle when digging or pulling close to the crown, though. Clematis roots don’t benefit from repeated disturbance of the surrounding soil.
The finished plant may still look somewhat bare and sleepy, and that is fine. Fall cleanup is about removing trouble, not making a dormant vine look neat enough for a garden show.
Adjust Watering for Cooler Fall Weather
The first cool days of fall can make it tempting to put away the hose and forget about watering until spring. For clematis, that can be a little too soon.
Roots are still active for part of fall, even when the vine above them has started losing leaves. If the season turns dry, the plant may still need an occasional drink before winter arrives.
No one-size-fits-all fall watering schedule exists. A clematis growing through weeks of regular rain may need nothing from you, while one experiencing a dry, mild October could still need watering.
Instead, check the soil. Push a finger a couple of inches into the ground near the plant, taking care not to disturb the roots. Damp soil can be left alone. If it feels dry below the surface, watering is probably worthwhile.
When you do water, give the root area a proper soak. A small splash that only darkens the surface does little for roots farther down.
Slow, thorough watering is especially useful after a stretch of dry weather because it lets moisture move deeper into the soil rather than running off across the surface.
Fall watering has another side that is just as important: too much water can cause problems. Cooler weather often keeps soil wet longer than it did in July or August. Add frequent autumn rain, and a garden bed with poor drainage can remain soggy for days.
Don’t keep watering just because it is part of your usual routine.
Pay extra attention to clematis planted earlier in the year. Its roots have had less time to spread into the surrounding ground, so extended dry periods can affect it sooner than a well-established plant.
Potted clematis needs checking too. Rain can wet the foliage while surprisingly little water reaches the compost, especially when a container sits close to a wall or beneath an overhang.
As late fall approaches, gradually water less often. The goal is simple: your clematis should reach winter with reasonably moist soil around its roots, not ground that is bone dry or permanently soaked.
Decide Whether Your Clematis Needs Fall Pruning
Fall often leaves clematis looking like it needs serious attention. Stems are tangled, leaves are fading, and the whole vine may appear past its best. Even so, this is one job where doing less can save you from disappointment later.
Before cutting anything substantial, work out which clematis you have. Different varieties produce flowers on different types of growth, and that determines when they should be pruned.
Clematis are usually placed into three pruning groups. Group 1 varieties flower on old growth and generally need little pruning. Group 2 clematis also flower from older stems, although some produce another flush on newer growth. Group 3 varieties flower on new growth and can handle a much harder prune, but that work is normally saved for later rather than tackled in fall.
This is why cutting an unknown clematis down simply because the stems look untidy is risky. Those seemingly unimportant vines could carry the growth responsible for flowers next year.
If you have lost the plant label and cannot remember the variety, leave most of the healthy stems where they are. Watch when it flowers and how it grows next season, which should make its pruning needs easier to identify.
Fall pruning can still include a little sensible tidying.
Snip away stems that have snapped or been badly damaged. Obviously, dead sections can go too. If you spot diseased growth, remove it carefully and clean your pruning shears afterward, particularly before using them on another clematis.
You don’t need to remove every old seed head either. Some develop into attractive fluffy clusters that can remain on the vine well into fall.
Most importantly, do not judge the plant by how scruffy it looks at this point in the year. Clematis naturally loses much of its summer appearance as it approaches dormancy. Unless you know that yours needs attention now, fall is a good time to put the pruning shears down.
Mulch the Roots Before Winter Arrives
By late fall, most obvious changes in clematis happen above ground. Leaves have faded, flowering has finished, and growth has slowed considerably. Down in the soil, however, the root system still deserves some attention before winter weather takes over.
Mulch helps shield the soil from rapid temperature changes. This can be especially valuable in places where sudden freezes follow mild spells.
You do not have to rush outside with mulch on the first cool September morning. Putting it down later in fall, once the soil has cooled, makes more sense. Aim to finish before the ground freezes and becomes hard to work.
Clear away weeds first, along with any diseased leaves or soggy plant debris sitting near the base. After that, spread roughly 2 to 4 inches of organic material over the soil around the root zone.
Shredded leaves are an easy choice if your yard produces plenty in fall. Leaf mold, compost, and well-rotted bark are other useful options. Whatever you use, spread it loosely instead of packing it down into a dense layer.
One detail is easy to get wrong. Mulch belongs over the soil, not in a mound against the clematis stems.
Leave a little open space around the crown. Constantly damp material pressed against the base can create conditions that favor decay, so piling mulch high around the vine does not provide better winter protection.
Recently planted clematis deserves particular attention. A mature vine has had time to develop roots farther into the surrounding soil, while a newer plant is still establishing itself. Protecting that root area before its first winter can be worthwhile, especially where temperatures regularly drop below freezing.
Check the mulch once or twice during late fall as well. Strong winds, heavy rain, or animals moving through the bed can shift lightweight material and expose patches of soil.
You don’t need to bury the root zone under an enormous heap. A modest, well-placed layer is enough to protect the soil as fall gives way to freezing weather.
Give Container Clematis Extra Protection in Late Fall
A clematis growing in a pot has one disadvantage when cold weather arrives. Unlike a plant in the ground, its roots have only the container walls and a limited amount of soil between them and freezing air.
That difference matters more as fall draws to a close, especially in areas where pots may freeze solid during winter.
Location is worth considering first. If the container spent summer in an exposed spot, late fall may be the time to move it somewhere quieter. Placing it near a sheltered wall or in a protected corner can keep it out of the worst cold winds.
You usually have no reason to bring a hardy clematis into a heated house. The plant needs its dormant period, and a warm room is not a substitute for sensible outdoor protection.
Pot size also plays a part. Soil in a large container tends to be better insulated than the smaller volume found in a compact pot. In particularly cold winters, insulating the outside of the container can help protect the roots from sharp temperature changes.
You can also put a layer of mulch over the potting mix. Keep it loose and avoid piling it around the crown.
While cold gets most of the attention, wet conditions can be just as troublesome in late fall. A pot sitting in water after days of rain is not a good place for clematis roots. Make sure the drainage holes remain open and raise the container slightly if water tends to collect underneath it.
Then watering becomes occasional rather than routine. Rain may take care of it for weeks at a time.
During a long dry spell, however, feel the potting mix rather than assuming a dormant plant needs no water at all. If it has become very dry and the mix is not frozen, it may still need a little water.
How far you need to go with winter protection depends on your climate and the clematis you grow. By late fall, the aim is to keep those container-bound roots from facing the harshest conditions completely unprotected.
Final Thoughts
Clematis does not ask for a long list of jobs once fall arrives. In fact, too much attention can sometimes cause more trouble than letting the plant follow its natural seasonal cycle.
Remove unhealthy debris, watch soil moisture, and think twice before cutting back healthy stems. As colder weather approaches, a layer of mulch can help protect roots in the ground, while potted clematis may appreciate a sheltered position.
Most of all, expect the vine to change. A clematis that was covered in flowers a few months earlier may look brown, bare, and rather unimpressive by late fall. That is not a reason to start cutting or feeding it to revive summer growth.
Once the necessary fall jobs are done, leave the plant to rest. Good clematis care at this time of year is often less about doing more and more about knowing when you have done enough.