
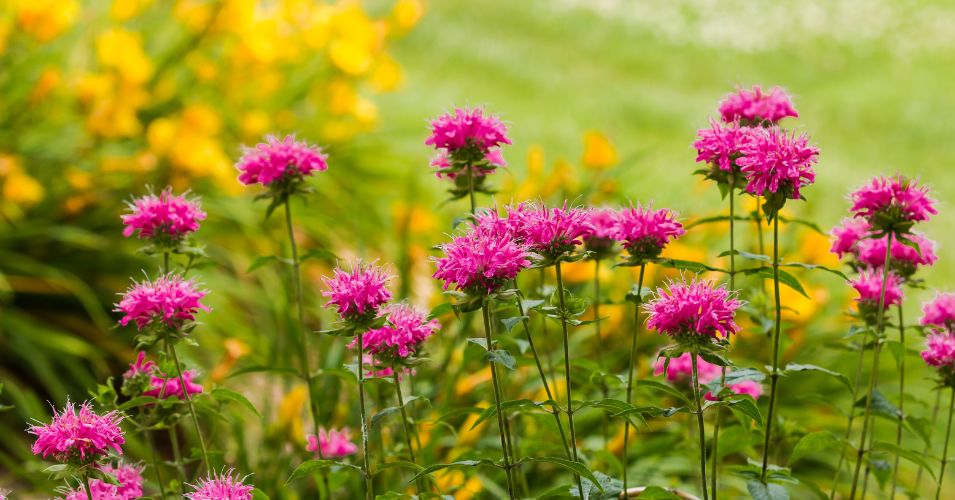
Bee balm can look pretty worn out by fall. The bright flowers are gone, stems may be leaning, and powdery leaves can make the whole patch seem ready for a major cleanup.
But grabbing the pruners and cutting everything down is not always the best move. Some plants need attention before winter, while others are better left mostly alone.
Fall is the time to remove unhealthy growth, rethink watering, protect roots when needed, and address overcrowded clumps. A few simple choices now can help bee balm get through cold weather without creating unnecessary work in the garden.
Cut Back Bee Balm at the Right Time
By fall, bee balm rarely looks as lively as it did a few months earlier. The flowers have faded, leaves may be turning brown, and once sturdy stems can start to flop. That does not mean you need to rush outside with the pruning shears as soon as September arrives.
Let the plant finish its season first.
Bee balm continues using its leaves after flowering, so green, healthy growth can stay in place while the weather remains mild. Once frost has killed the top growth and the plant has gone dormant, you can cut the stems back to about 2 to 4 inches above the soil.
Use sharp, clean pruning shears rather than snapping the stems by hand. Leaving a short section above ground also makes it easier to remember where the plant is once the garden becomes bare in winter.
You do not have to cut every healthy bee balm plant back in fall, though.
Those dry seed heads that look untidy to some gardeners can be useful in a winter garden. Birds may visit them for seeds, and old stems can provide hiding places for insects. If you enjoy leaving some structure in your beds through winter, healthy bee balm stems can remain until spring.
Mildewed or badly damaged plants are another matter. Bee balm often develops powdery mildew, which leaves a white or gray coating on the foliage. If a plant is heavily affected, cutting back the diseased growth and removing it from the bed is a sensible fall job.
Try not to tug at stubborn stems. Pulling them can disturb the crown and roots when a quick snip would do the job safely.
There is no prize for having the first bee balm in the neighborhood cut to the ground. Watch the plant and the weather instead. Once growth has naturally wound down, you can decide whether to tidy it up or leave healthy stems standing for winter visitors.
Clear Away Diseased and Dying Foliage
Take a look underneath your bee balm in fall, and you may find a rather messy collection of leaves, broken stems, weeds, and dried flower pieces. Some of that material is harmless, but you should deal with diseased foliage before winter settles in.
Powdery mildew is usually the main concern.
It is easy to recognize because affected leaves look as though they have been dusted with white or gray powder. Bee balm is particularly susceptible, and mildew often becomes more obvious toward the end of summer when plants have spent months growing into a thick clump.
Pick up infected leaves from the soil and cut away badly affected stems. Do the same with foliage that is rotting or showing other obvious signs of disease. Leaving piles of unhealthy plant material tucked around the crown does not benefit the plant, even if you normally prefer a relaxed approach to fall cleanup.
Be selective rather than clearing every last leaf from the bed.
Healthy stems and seed heads can stay if you want to provide winter shelter and food for wildlife. Fallen leaves from healthy plants can also have value in a garden. Avoid letting diseased bee balm foliage build up directly around the plant.
Think twice before tossing mildewed leaves onto your home compost pile. Unless the pile reaches temperatures high enough to break down diseased material properly, it may be better to dispose of those leaves according to local garden waste recommendations.
While you are working around the plant, check how crowded the clump has become. Bee balm spreads through underground rhizomes and can gradually turn into a dense patch. Crowded stems receive less airflow, which can make mildew problems worse.
Pull any weeds you find as well, especially perennial weeds that would otherwise sit unnoticed through winter and start growing quickly in spring.
Fall cleanup does not need to leave the bed spotless. Instead, remove the material you don’t want hanging around while leaving healthy parts of the garden useful for wildlife.
Adjust Watering and Skip Late Fertilizing
Cooler fall weather changes how quickly bee balm uses water. With shorter days and lower temperatures, the soil usually stays moist for longer, so a watering routine that worked in July may be far too much by October.
Check the soil instead of following a schedule. Push a finger a couple of inches into the ground near the plant. If the soil still feels damp, there is no reason to add more water. If it feels dry and your area has gone through a stretch without rain, water slowly around the root zone until the soil is thoroughly moist.
This becomes more important during a dry fall.
Bee balm may look as though it has finished for the year once its flowers fade and its leaves begin to decline, but the roots can still suffer if the soil becomes extremely dry before winter. An occasional deep watering during prolonged dry weather is usually more helpful than frequent, shallow watering.
Recently planted and divided bee balm needs a closer watch. These plants are still establishing roots and cannot reach moisture as effectively as an older clump. Keep their soil reasonably moist, but never soggy.
Fall is also the time to stop pushing the plant to produce more growth.
A dose of high-nitrogen fertilizer late in the season can encourage fresh leaves and stems. That new growth may not have enough time to harden before frost arrives, leaving it vulnerable to cold damage.
For that reason, save regular feeding for the growing season rather than giving bee balm one final boost before winter.
If the soil is poor, you can top dress the area with a small amount of finished compost. Spread it over the surrounding soil instead of heaping it against the plant’s crown.
By this point in the year, bee balm does not need encouragement to keep performing. Water only when the soil and weather tell you it is necessary, and allow the plant to wind down at its own pace.
Divide or Transplant Bee Balm in Early Fall
Bee balm does not always stay where you first planted it. Its underground rhizomes gradually spread outward, and after a few seasons, one modest plant can turn into a wide, crowded clump. If stems are packed together or the middle of the plant looks tired and sparse, early fall can be a good time to divide it.
Timing is important here. Newly divided bee balm needs several weeks to grow roots before the ground freezes, so do this in early fall rather than in the final days before winter.
Pick a cool day and water the soil beforehand if it is dry. Dig around the outside of the clump with a spade or garden fork, then lift as much of the root mass as you can without tearing it apart.
Once it is out of the ground, the clump should be easier to examine. Pull or cut it into smaller sections, keeping healthy roots and several shoots or growing points on each piece. Remove any dead, weak, or woody material from an aging center rather than replanting it.
Before putting the divisions back into the garden, think about why the original clump became crowded. Bee balm spreads readily, so giving each section more room now can save another round of thinning sooner than expected. Extra space also improves airflow through the foliage, which helps plants that commonly struggle with powdery mildew.
Plant the divisions at the same depth they were growing previously. The crown should sit close to soil level rather than being buried several inches down.
Water each plant well after planting and keep an eye on the soil during dry fall weather. You want the roots to establish without leaving them in constantly wet ground.
If cold weather has arrived earlier than expected, leave division until another suitable planting window. Moving bee balm is useful, but giving a freshly disturbed root system only a few days before the ground freezes is not.
Mulch Bee Balm for Winter Protection
Bee balm is a hardy perennial, so established plants are not usually helpless when cold weather arrives. Still, mulch can help in fall, especially where winters bring repeated freezes, exposed soil, or sudden temperature swings.
Wait until the weather has turned consistently cold before adding it.
Putting down a heavy layer while the soil is still warm can hold extra warmth and moisture around the plant. Instead, allow the bee balm to become dormant and give the ground time to cool.
Then spread about 2 to 3 inches of loose organic material over the soil surrounding the plant. Shredded leaves are an easy choice if you already have them in the yard. Straw and pine needles also work, as long as the material is clean and free of weed seeds or diseased plant debris.
Mulch helps in ways that are sometimes misunderstood. Its main job isn’t to make the soil cozy or keep it from freezing. It reduces sharp changes in soil temperature and helps protect against repeated freezing and thawing.
Those temperature swings can cause the ground to expand and contract. In some conditions, this movement may push shallow roots or parts of the crown closer to the surface, where they are more exposed.
Keep mulch a short distance away from the crown itself. Packing a thick, damp layer directly over the center of bee balm can hold too much moisture around the plant. Think of mulch as protection for the surrounding soil rather than a pile that needs to cover every visible inch.
Young plants and divisions established earlier in fall may appreciate this extra protection more than mature clumps with well-developed root systems.
Bee balm growing in a container is another case altogether. A pot offers much less insulation than the ground, so move it somewhere sheltered if your winters are particularly cold.
Once the mulch is down, there is little else to do. Leave it through winter and deal with it when growth starts returning in spring.
Final Thoughts
Bee balm does not need an elaborate fall routine. Most of the work comes down to cleaning up problems, responding to the weather, and helping the plant enter winter in good condition.
Remove diseased foliage, ease up on watering as temperatures cool, and avoid fertilizer that encourages late growth. Mulch can protect plants in colder gardens, while crowded plants may benefit from being divided early enough in fall to establish new roots.
You can also leave healthy stems and seed heads standing if you prefer a less tidy garden that offers birds and insects something to eat through winter.
Pay attention to the plant in front of you rather than treating every fall task as a requirement. A healthy, established bee balm may need very little from you before cold weather arrives, while a crowded or mildew-affected plant will benefit from a bit more attention.