Daylilies are one of those garden staples that just keep on giving.
From early summer through fall, they bloom with stunning flowers that brighten up any yard.
But as the growing season winds down, your daylilies will begin to fade, and it’s time to think about pruning them.
October is the perfect month to get this done, especially before the first frost hits.
I’ve spent years growing and pruning daylilies in my own garden, and I’ve learned that fall pruning is an essential part of keeping them healthy and ready for the next growing season.
In this guide, I’ll walk you through the steps of pruning daylilies in October, share some tips from my own experience, and give you advice on how to care for these hardy plants as they prepare for winter.
Why Prune Daylilies in October?
Pruning daylilies in October serves several important purposes.
As the weather cools, daylilies naturally begin to die back, and the foliage can become yellowed, wilted, and unsightly.
Pruning them at this time not only tidies up your garden, but it also prevents pests and diseases from settling in the dead foliage over the winter.
I’ve found that if I don’t prune my daylilies in the fall, they can become a haven for slugs and other pests, which only causes more problems come spring.
Pruning also helps the plant conserve energy for the next growing season.
By removing dead and dying leaves, you allow the daylily to focus its energy on developing strong roots and preparing for its dormancy period.
When done properly, fall pruning sets the stage for healthier, more vigorous growth when spring arrives.
Tools You’ll Need for Pruning Daylilies
Before you start pruning, it’s important to gather the right tools.
You don’t need anything fancy, but having the right equipment will make the job easier and more efficient.
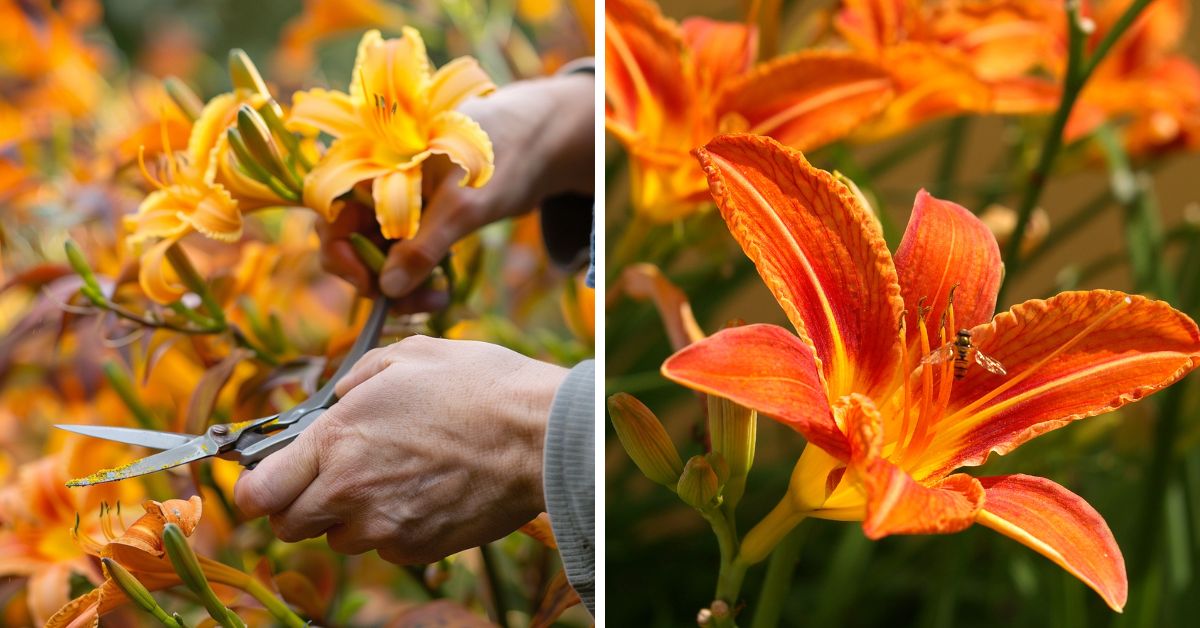
Pruning shears
A sharp pair of pruning shears is essential for cutting through the thick stems of daylily leaves.
I’ve used dull shears before, and they tend to tear the foliage instead of giving a clean cut, which can leave the plant vulnerable to disease.
Gardening gloves
Daylilies aren’t prickly, but I always wear gloves when pruning to protect my hands from dirt and any insects that might be hiding in the foliage.
Plus, gloves give you better grip and control when cutting back the stems.
Rake
After pruning, I like to use a small rake to clear away any fallen leaves and debris around the base of the plant.
This helps keep the area clean and reduces the chances of pests overwintering in the dead foliage.
How to Prune Daylilies in October
Pruning daylilies in October is a straightforward process, but there are a few key steps to follow to make sure you’re doing it right.
Here’s how I prune my own daylilies each fall to keep them looking great and ready for next year.
Step 1: Wait for the foliage to start dying back
The first thing to do is wait until the daylily foliage begins to die back naturally.
In October, you’ll start to notice the leaves turning yellow or brown and wilting.
This is a sign that the plant is entering its dormancy phase and is ready to be pruned.
I’ve found that pruning too early, when the leaves are still green and actively growing, can stress the plant.
It’s better to wait until the leaves are naturally fading before you start cutting them back.
Step 2: Cut back the dead leaves
Once the foliage has started to die back, it’s time to start pruning.
Using your pruning shears, cut each leaf stem back to about 1-2 inches above the ground.
I like to leave a small portion of the stem intact rather than cutting it flush with the soil, as this helps protect the crown of the plant.
Cutting back the dead leaves not only tidies up the garden but also prevents pests from hiding out in the decaying foliage during the winter months.
In my experience, this simple step has made a big difference in keeping slugs and other pests at bay.
Step 3: Remove any damaged or diseased leaves
While you’re pruning, take a close look at the daylily leaves to check for any signs of damage or disease.
Leaves that are spotted, hole-riddled, or discolored should be removed along with the dead foliage.
This helps prevent any diseases from spreading to the rest of the plant or other plants in your garden.
I’ve learned that if I don’t remove these damaged leaves in the fall, the problem usually reappears stronger in the spring.
It’s worth taking the time now to make sure your daylilies stay healthy through the winter.
Step 4: Tidy up the base of the plant
Once you’ve cut back the foliage, it’s important to tidy up the base of the plant.
Using your rake, remove any fallen leaves or debris that may have collected around the daylily.
This helps keep the area clean and reduces the risk of pests or diseases overwintering in the soil.
How Much to Prune
When it comes to pruning daylilies in October, the general rule is to cut back all of the dead or dying foliage.
In most cases, this will mean removing the majority of the leaves, especially if they’ve already turned yellow or brown.
If your daylilies are young or if you’re in a particularly warm climate, you might choose to leave a bit more of the foliage intact.
However, I’ve found that cutting back most of the leaves in the fall results in healthier, more vigorous growth the following spring.
In my garden, I usually cut back the daylily leaves to about 1-2 inches above the ground.
This helps protect the plant’s crown and keeps the garden looking neat as winter approaches.
What to Do with the Pruned Leaves
After you’ve finished pruning your daylilies, you’ll likely have a pile of dead leaves and stems to deal with.
Rather than tossing them in the trash, consider using them in your garden or around your home in a more sustainable way.
Composting
Daylily leaves break down well in a compost pile, adding valuable organic material that can later be used to enrich your soil.
I like to chop the leaves into smaller pieces before adding them to my compost bin, as this helps them decompose more quickly.
Mulching
If you don’t have a compost bin, you can also use the pruned leaves as mulch around other plants in your garden.
I’ve found that daylily leaves make excellent mulch for flower beds, helping to retain moisture and suppress weeds.
Disposing of diseased leaves
If any of the leaves you’ve pruned show signs of disease, it’s best to dispose of them rather than composting.
This prevents the disease from spreading to other plants in your garden.
I usually bag up any diseased leaves and throw them away to keep my compost healthy.
Preparing Daylilies for Winter
After you’ve pruned your daylilies in October, there are a few steps you can take to help them survive the winter and come back strong in the spring.
Mulching
One of the best things you can do for your daylilies after pruning is to add a layer of mulch around the base of the plant.
This helps insulate the roots and keeps the soil temperature more stable as winter sets in.
I use a thick layer of organic mulch, like shredded leaves or straw, and spread it evenly around the plant, making sure not to pile it directly against the stems.
Watering
If the fall has been dry, give your daylilies a deep watering after pruning to help them settle in for the winter.
While daylilies are fairly drought-tolerant, a little extra water in the fall can help them survive the winter in better condition.
Just be careful not to overwater, as soggy soil can lead to root rot.
Avoiding Common Pruning Mistakes
Pruning daylilies is relatively simple, but there are a few common mistakes that can affect the health of your plants.
Here are some tips I’ve picked up over the years to help you avoid these pitfalls.
Pruning too early
One of the most common mistakes is pruning daylilies too early in the fall, before the foliage has started to die back naturally.
This can stress the plant, as it’s still actively photosynthesizing and storing energy for the winter.
It’s better to wait until the leaves turn yellow or brown before pruning.
Cutting too close to the ground
Another mistake is cutting the daylily leaves too close to the ground.
I’ve found that leaving a small portion of the stem intact helps protect the plant’s crown and encourages healthier regrowth in the spring.
Ignoring damaged or diseased leaves
While it’s tempting to focus only on the dead foliage, it’s important to remove any leaves that show signs of damage or disease.
This helps prevent pests and diseases from overwintering in the garden and affecting your daylilies next year.
Why Daylilies Die Back in Fall
Daylilies are perennials, meaning they go dormant in the winter and come back to life in the spring.
As temperatures drop, the leaves naturally begin to die back, turning yellow and eventually brown.
This is a normal part of the plant’s life cycle, and by pruning the dead foliage in October, you’re helping it conserve energy for the next growing season.
In my garden, I’ve learned to embrace this seasonal change.
While it can be sad to see the daylilies fade away, I know they’ll come back stronger and more beautiful in the spring.
Winter Protection for Daylilies
Daylilies are hardy plants that can survive most winters with little extra care.
However, if you live in an area with particularly harsh winters, there are a few steps you can take to give your daylilies some added protection.
After pruning and mulching, consider covering your daylilies with a layer of burlap or a frost blanket if you expect extremely cold temperatures.
This helps insulate the plant and protects it from freezing winds and harsh winter conditions.
In most regions of the US, though, daylilies will survive the winter just fine with a good layer of mulch and a little extra care.
Final Thoughts
Pruning daylilies in October is a simple but essential task that helps keep your garden tidy and prepares the plants for winter.
By following these steps, you’ll encourage healthier, more vigorous growth in the spring and keep pests and diseases at bay.
I’ve found that taking the time to prune my daylilies in the fall pays off in the long run, as my plants come back stronger and more beautiful year after year.
So grab your pruning shears, head out to the garden, and give your daylilies the care they deserve this October.
You’ll be rewarded with a garden full of vibrant, healthy plants next season!