Daylilies are one of the easiest and most rewarding plants to grow in any garden.
With their hardy nature, beautiful blooms, and minimal maintenance needs, they’re a favorite for many gardeners, including myself.
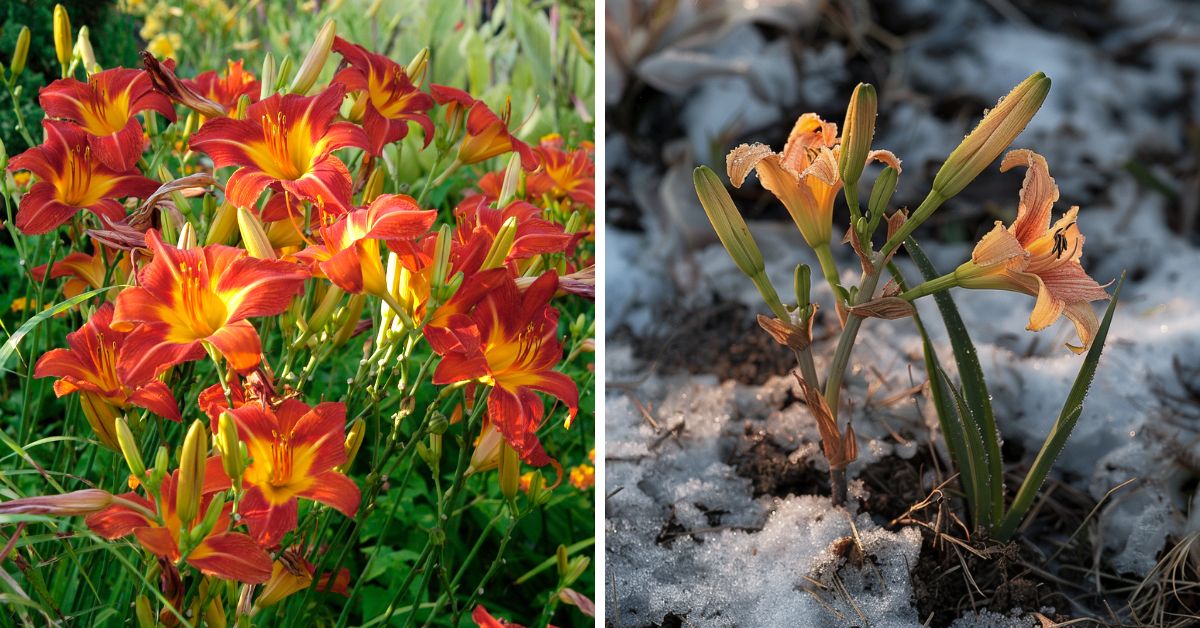
But even though daylilies are resilient, they still need a bit of care to make sure they survive the winter and come back strong in the spring.
October is the perfect time to get your daylilies ready for the cold months ahead.
In this guide, I’ll walk you through exactly what to do in October to protect your daylilies during the winter.
From pruning to mulching, I’ll share practical tips and some personal lessons I’ve learned from caring for my own daylilies over the years.
Why Preparing Daylilies in October is Essential
While daylilies are known for being tough and able to survive in a range of conditions, winter can be challenging for them, especially in colder climates.
The key to their survival is making sure they go into winter in the best possible shape.
By taking care of your daylilies in October, you’re giving them the foundation they need to not just survive the winter but to thrive when spring rolls around.
In my own experience, the extra effort you put in during the fall pays off big time when your daylilies burst back to life with healthy, vibrant blooms.
Cut Back the Foliage
The first thing to do in October is to prune your daylilies.
By this time of year, the foliage will have started to die back naturally.
You’ll notice the leaves turning yellow or brown, signaling that the plant is preparing to go dormant for the winter.
Why Pruning is Important
Pruning the dead and dying foliage helps reduce the risk of pests and diseases that can hide in the decaying leaves over the winter.
I’ve found that when I skip this step, my daylilies tend to have more issues with slugs and other pests come spring.
Plus, cleaning up the garden at this time makes everything look much tidier.
How to Prune Daylilies in October
Use a pair of sharp pruning shears to cut the leaves back to about 1-2 inches above the ground.
You don’t need to cut them all the way down to the soil—just enough to remove the majority of the foliage.
In my experience, leaving a little bit of the stem above the ground helps protect the plant’s crown during the winter.
Be sure to dispose of the cut foliage properly, especially if it shows any signs of disease or damage.
Mulch to Protect the Roots
Mulching is one of the best things you can do to protect your daylilies during the winter.
Adding a layer of mulch around the base of the plant helps insulate the roots and keeps the soil temperature more consistent as the weather cools.
Choosing the Right Mulch
When it comes to mulching, I like to use organic materials like shredded leaves, straw, or wood chips.
These break down over time, adding nutrients back into the soil, which helps your daylilies grow stronger in the spring.
How to Apply Mulch
In October, spread a 2-3 inch layer of mulch around the base of each daylily.
Make sure not to pile the mulch directly against the crown of the plant, as this can lead to rot.
Instead, leave a little space around the stem and spread the mulch out evenly around the plant.
I’ve found that mulching also helps retain moisture in the soil, which is important during the winter months when the ground can dry out more quickly.
Water Deeply Before the First Frost
Even though the growing season is over, your daylilies still need water before winter sets in.
October is a great time to give your plants one last deep watering before the first frost arrives.
Why Watering is Important in October
Winter can be particularly harsh on plants if the soil is too dry.
By giving your daylilies a good watering in October, you ensure that the roots have enough moisture to sustain them through the cold months.
I’ve learned the hard way that skipping this step can lead to dry, damaged plants come spring.
A little extra water now goes a long way in helping your daylilies survive the winter.
How to Water Daylilies in October
Focus on deep watering, meaning you want the water to penetrate down to the roots.
This is more effective than just wetting the surface of the soil.
I use a soaker hose or a watering can, making sure the water soaks in slowly and thoroughly.
Be careful not to overwater, though—too much water can lead to root rot, especially if the ground stays soggy through the winter.
Divide Overcrowded Clumps
If your daylilies have been growing in the same spot for a few years, October is a great time to divide them.
Dividing daylilies helps prevent overcrowding, which can lead to fewer blooms and weaker plants over time.
Why Dividing is Important
Daylilies naturally multiply over time, and if left unchecked, they can become crowded.
I’ve had daylily clumps that were so packed together, they stopped blooming as well as they used to.
Dividing them every few years helps keep the plants healthy and ensures they have enough space to grow.
How to Divide Daylilies
First, dig up the entire clump of daylilies using a spade or garden fork.
Be sure to dig wide enough to avoid damaging the roots.
Once you’ve lifted the clump, gently separate it into smaller sections, each with at least three or four healthy stems and a good amount of roots.
Replant the divided clumps in well-drained soil, spacing them about 18-24 inches apart to give them room to grow.
I’ve found that daylilies adapt well to being divided, and they’ll reward you with even more blooms next season.
Protect Daylilies from Frost Damage
While daylilies are tough plants, they can still be susceptible to frost damage, especially in colder climates.
Taking a few extra steps to protect them from frost can help ensure they survive the winter without any issues.
Use a Frost Blanket
In regions where frost arrives early or temperatures drop suddenly, I like to cover my daylilies with a frost blanket or burlap for added protection.
This helps insulate the plants and prevents the frost from damaging the crown or roots.
You don’t need to keep the frost blanket on all winter—just during particularly cold snaps or when frost is expected.
Avoid Cutting Too Close to the Ground
One of the best ways to protect your daylilies from frost damage is by leaving a small portion of the stems above the ground.
I’ve noticed that plants that are cut too close to the soil tend to suffer more from frost heaving, which is when the ground repeatedly freezes and thaws, pushing the roots out of the soil.
By leaving a bit of the stem, you help protect the plant’s crown and reduce the risk of frost damage.
Check for Pests and Diseases
October is also a good time to inspect your daylilies for any signs of pests or diseases that might affect them over the winter.
While daylilies are relatively pest-resistant, they can still fall victim to issues like rust, crown rot, or aphid infestations.
I’ve learned to check my plants thoroughly in the fall, as catching problems early can save you a lot of headaches in the spring.
Treating Rust or Leaf Spot
If you notice any signs of rust or leaf spot on your daylilies, it’s important to remove the affected leaves and treat the plant with a fungicide if necessary.
In my experience, these fungal diseases are more of a problem in humid areas, but it’s always good to keep an eye out, especially before winter.
Checking for Aphids
Aphids can also be a problem for daylilies, although they’re more common in the spring.
I’ve occasionally found aphids lingering on the leaves in the fall.
If you notice any pests, try spraying the plant with a mixture of water and a few drops of dish soap to get rid of them before winter sets in.
Plan for Next Spring
The work you do in October isn’t just about helping your daylilies survive the winter—it’s also about setting them up for success in the spring.
By preparing your daylilies now, you’re giving them the best chance to thrive and bloom beautifully when the weather warms up.
Keep a Garden Journal
One thing I like to do is keep a garden journal where I note how my daylilies performed throughout the year.
Did they bloom as much as I expected?
Did any of the clumps seem overcrowded?
These observations help me plan for what I need to do next year, whether it’s dividing more plants or adjusting my watering routine.
Fertilize in Early Spring
While you don’t need to fertilize daylilies in the fall, I like to plan for a light application of fertilizer in early spring.
This gives the plants a boost as they wake up from dormancy and start growing again.
I’ve found that using a balanced fertilizer in the spring results in stronger, healthier plants that produce more flowers.
Final Thoughts
Daylilies are tough plants, but they still need a bit of care in October to ensure they survive the winter and come back strong in the spring.
By following these simple steps—pruning, mulching, watering, dividing, and protecting from frost—you’ll help your daylilies thrive through the cold months and reward you with vibrant blooms next year.
In my years of gardening, I’ve learned that a little effort in the fall goes a long way when it comes to the health and beauty of your daylilies.
So take some time this October to give your daylilies the care they need.
Trust me, your garden will thank you when spring arrives with a burst of color!